Video making is one of the most popular forms of content creation today, whether for social media, professional purposes, or personal projects. With the rise of platforms like YouTube, TikTok, and Instagram, anyone with a camera or smartphone can create and share videos. However, to make engaging and professional-quality videos, it takes more than just hitting the record button. From planning to editing, video making is an art form that involves multiple steps. This article will guide you through the essentials of video making, providing you with the knowledge and tools needed to start creating high-quality videos.
1. Pre-Production: Setting the Foundation
The key to making a successful video is solid planning. This is what the pre-production phase is all about. It’s where you lay the groundwork for your video, ensuring that you know exactly what you’re creating and how to do it effectively.
Conceptualize Your Idea
Before anything else, you need to determine the purpose of your video. Is it educational? Entertaining? Promotional? Once you have the goal in mind, brainstorm ideas that align with that purpose. Write down your thoughts and begin refining your concept.
Scriptwriting and Storyboarding
A good script is crucial for a well-structured video. If your video includes dialogue or a voiceover, write a script that outlines what will be said, when, and how. Even if your video doesn’t have a script, it’s still a good idea to create a brief outline of key scenes and moments.
Storyboarding is a visual tool that helps plan your video’s shots and scenes. You don’t need to be an artist to do this—simple sketches or even a list of scenes with brief descriptions will help you visualize the flow of your video. Storyboarding is especially helpful when working with a crew or actors.
Organize Your Equipment and Crew
Make sure you have access to the necessary equipment before filming. Basic equipment includes a camera (or smartphone), a tripod, a microphone, and adequate lighting. For more advanced projects, you might need additional gear such as a gimbal for smooth shots or green screens for special effects.
If you’re working with others, communicate your vision to the cast and crew. Clear communication will ensure that everyone knows their roles and responsibilities, making the filming process smoother.
2. Production: Capturing Your Video
The production phase is where all the planning and preparation come together. It’s time to capture your video footage and create the raw material for your project.
Camera Settings and Composition
Regardless of whether you’re using a smartphone or a professional camera, understanding your camera settings is essential. Adjust your resolution, frame rate, and exposure based on your project’s needs. For instance, 24 frames per second (fps) is typically used for cinematic looks, while 30 fps is more common for online content.
Good composition is key to creating visually appealing shots. Keep the rule of thirds in mind by dividing your frame into a 3×3 grid and positioning your subject at the intersection points. This will help avoid cluttered or static shots and create more balanced, aesthetically pleasing visuals.
Lighting
Lighting can make or break your video. Natural light is a great option for beginners, but if you’re filming indoors or in low-light conditions, you may need extra lights. The three-point lighting setup (key light, fill light, and backlight) is a common technique to achieve professional-looking results, helping to highlight your subject and reduce shadows.
Sound
While good visuals are important, clear sound is just as essential. The built-in microphones on cameras or smartphones often don’t capture the best sound quality, so investing in an external microphone is a good idea. Lavalier mics (clip-on mics) are great for interviews, while shotgun mics are perfect for capturing sound from a distance.
Make sure you monitor your sound levels during filming. Poor audio can detract from an otherwise good video, so avoid recording in noisy environments and ensure that your microphone placement is optimal.
Directing the Talent
If your video features people speaking or acting, it’s important to provide clear direction. Give your actors or on-screen talent guidance on their lines, movements, and expressions. Ensure everyone is aware of the tone and style of the video, so they know how to deliver their performances effectively.
3. Post-Production: Editing and Polishing
Once the filming is done, the real magic happens in the editing room. Post-production is where you can shape your raw footage into a polished video that tells your story effectively.
Video Editing
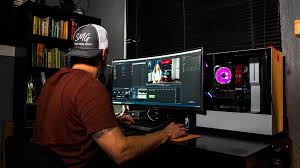
This is where you trim, arrange, and refine your footage. Using editing software like Adobe Premiere Pro, Final Cut Pro, or DaVinci Resolve, you can cut out unnecessary scenes, smooth out transitions, and arrange the shots in the desired order.
When editing, always keep your video’s flow in mind. Try to maintain a consistent pace, and ensure that your story unfolds naturally. The goal is to engage the audience and keep them interested from beginning to end.
Sound Editing and Music
The sound quality of your video can be enhanced during editing. You can remove background noise, adjust levels, and even add sound effects or voiceovers. Music can elevate the emotional impact of your video, so choose tracks that match the tone. Make sure the music doesn’t overpower dialogue or important sound elements.
Color Grading
Color grading is the process of enhancing or altering the colors in your footage to create a specific look or mood. Whether you want to give your video a warm, nostalgic tone or a cool, futuristic vibe, color grading can help achieve that. Many editing programs offer preset filters, but you can also manually adjust elements like exposure, contrast, and saturation.
Adding Graphics and Effects
Graphics can enhance your video and provide additional context. You might want to include text overlays, titles, lower-thirds, or animation effects. Special effects can add a professional touch or help tell the story in creative ways. However, remember that effects should support the content, not overwhelm it.
4. Distribution: Sharing Your Video
Once your video is edited and finalized, it’s time to share it with your audience. Choose the appropriate platform for distribution based on your target audience. If you’re aiming for a wide reach, YouTube is a popular choice, while Instagram and TikTok are better suited for shorter, more engaging videos.
Optimize your video for search engines by adding relevant keywords to the title, description, and tags. This will help increase its discoverability and attract more viewers.
Conclusion
Video making is an exciting and dynamic process that combines creativity with technical skills. Whether you’re making a short video for social media or a full-length film, understanding the fundamentals of video production—from planning and shooting to editing and sharing—can help you create compelling content that resonates with your audience.
By following the steps outlined in this guide, even beginners can start creating high-quality videos. Remember, the most important thing is to keep learning and experimenting. Over time, you’ll improve your skills and develop your unique style as a video creator. So grab your camera, start planning, and let your creativity shine!